Crafty Crap

DIY Craft of The Season: Mason Jar Snow Globes

When I saw these at my local Anthropologie retailing for about $28 my first thought was immediately "I can SO make these for SO much less." And since I need to throw myself into at least one craft a year, I went on a mission to make the perfect mason jar snow globes. 

And since all the postings on Pinterest for this craft seemed to just be a basic "HOW TO" - I thought I would take you deeper into what I have learned while trying to make these "craftacular."

1) The Trees:

The best ones to use are actually the ones from Michaels that are meant for the California Missions. Now, that being said, I'm not sure they sell all the California Mission stuff outside of California. {Duh} But I'm sure your local craft store has little model trees. Don't get the super little ones. They get lost. Get the ones that are about 5 inches or so tall.

2) The Snow:

I used 3 kinds of "snow"

  1. Snow Neige - WOW, I love this stuff. It's perfect for spraying on the little trees to flock them a bit. 
  2. Glittery Craft Snow - also from Michaels. Just a little bag. 
  3. Regular Flakey Craft Snow - Used to create scenes with the ceramic Christmas houses, this is a pretty big bag. I actually put the glittery ones and the regular ones in a big ziploc bag to mix together. 

3) The Mason Jars

This is where me doing this first can help you out. You want the QUART sized, Wide Mouth, as plain as you can get jars. Don't do the "quilted" ones because you can't see the trees though them. Also, pint sized jars are too short for the trees. Most grocery stores carry a decent selection of mason jars and they run about $12 for a dozen. 

If you want to do a bigger display, Target does have glass jars for about $5 each.  


The steps:

1) Flock the trees with Snow Neige and try not to go crazy and flock everything in sight. {real issue, I promise. It's SO MUCH FUN.}

2) Use glue dots to secure the flocked trees to the inside of the lids.

3) Put about 2 pinches of the snow mix into the jar. Just enough to cover the bottom of the jar. You really don't need a lot at all. If you use too much it will bury the tree. (plus the more times you take it out and put it in the bigger the mess you will make)

4) Put lid on and flip over. Voila!

5) I tied a little ribbon around the bottom for a festive look. But you can use twine or add a little tag. 

These turned out SO cute I can't stand it. They are a perfect hostess gift for all those parties or even just little things to give to your neighbors. Also would make a good Teacher gift OR if you are the room mom that needs to organize the Holiday craft, this would be a good one!

Also, if you went crazy with the Neiman Marcus/Target collection and bought way too many of the Tory Burch lunch boxes thinking they would sell out in moments and that you would be the COOLEST friend ever by having extras to give as presents {yea, who could I be talking about?!} these jars fit perfectly into these lunch boxes and it looks super cute. 


Stamp (and eat) it up!

For those of you that may not be as obsessed with Paper Source as I am (4Square mayor of the Carlsbad store -HOLLA!) I wanted to share a really cool idea that they posted on their blog today - using a rubber stamp to create a design on plate.. that's edible!

Picture from Paper Source blogApparently you mix powdered sugar, a little food coloring, and a little water to make a sugar based "paste". Then using a paper towel, you apply the mix to a clean, new rubber stamp, stamp the plate and let it dry and harden. 

How cool and easy is that?!

I'm going to experiment with this later and see what else you can decorate with this interesting, edible idea. 


Party Hangover

First let me say that everyone should throw themselves a birthday party every few years. I'm an Aries and ramming my birthday into other people's lives is something that I do very, very well. I love celebrating birthdays - mine, the kids, Jason's.. but the problem with organizing a going out night these days is getting groups on the same page. Some people like nice dinners and early nights, others like to meet at a bar. There always seems to be that point in the evening where you lose people in the transition and you feel bad because you are forcing others to pay money to do something that they may really not want to do. I wanted to celebrate, have a good time, have good music, good food and good drinks and a general good time with my friends. Plus it doesn't hurt that I totally like to throw parties. A Win-Win situation. 

A few months ago when I was working with It's a Luv Thing on the Leucadia Sends Luv event, I met Marsha. SUPER Sweet and well connected "jane of all trades" that lives just down the street from me. She's an amazing coordinator and bartender all in one. Being that I wanted to also ENJOY my own party, I hired her for the evening. She had the DJ connection, so there we were. Marsha made the party - literally. She made everyone there a martini or a lemon drop - she helped me set up and she helped me clean up. At one point I mentioned that I wish I had the Bliss Lights that they had at the Leucadia Sends Luv event, and she was on the phone arranging them for me in minutes. She rocked. Especially because I ended up a bit crunched for time and jumping in the shower at 6:45!

The night before the party I had my list of things that I needed to get done - Trader Joe's, BevMo, Cake Ball Prep, cleaning and organizing (I'm usually very meticulous, pulling out linens placing things where I know I want them set up) but thanks to a certain 2.5 year old's meltdown and margaritas that were a wensie-bit too strong at dinner, all I managed to do is plop some chocolate on the cake balls and crawl into bed. I also had a slow start on Saturday morning (damn, margaritas) so needless to say I was a little behind schedule. 

But as always, things came together beautifully, ifIdosaysomyself..

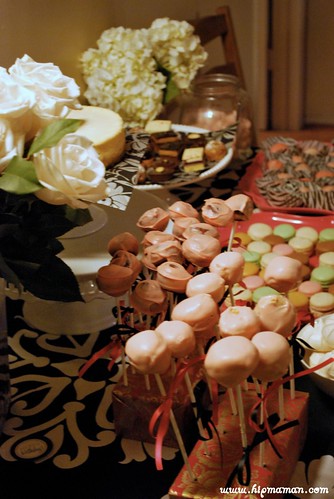
 While the cake balls were not the object of perfection like I was envisioning them to be, I saved them by putting them in black and white Zebra striped cupcake wrappers. And let me tell you, they were the HIT of the party. Yes, Pete Schweddy was quoted multiple times throughout the night, because "No one could resist my moist, delicious balls."

While really not photogenic, the Bliss Lights lit up the back like Pandora. And the vodka bar made everything, well, fuzzy and delightful!

A few things didn't go as planned.. the chandelier sticker is actually from Target - the Etsy one had more problems than I care to discuss - and I totally forgot about the pink and black paper poms, which I didn't even think about until I saw them sitting on my desk the next day. LaLaLa!